Uncategorized
arnold on May 03, 2026
If you are running Google Ads for a nonprofit, you have probably noticed a frustrating trend. It is getting harder and harder to successfully bid on certain keywords.
Google wants to see your target keywords heavily integrated into the content of your landing pages. The problem? A lot of standard nonprofit websites just don’t have a ton of keyword-dense copy on their main pages to support their campaigns.
To get around this limitation, there is a simple workaround: we are going to create individual, hyper-specific blog posts tailored to the different groups within your Google Ads campaigns.
Keep in mind, this content is not going to show up publicly on your main website pages or navigation. It is just going to exist in the background as dedicated landing pages that Google can use to validate and serve your ads.
Let’s get right into exactly how to set this up.
Getting Started: Creating Your WordPress Post
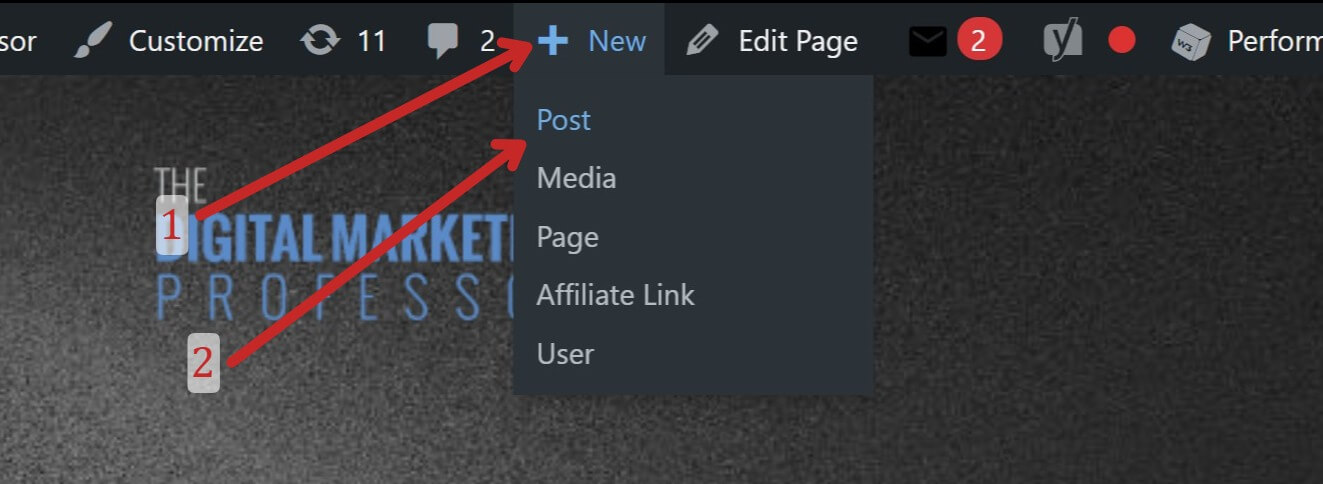
First things first, log into the backend of your WordPress website.
At the very top of your dashboard, look for the top menu bar. Hover over the + New button and click on Post from the dropdown menu.
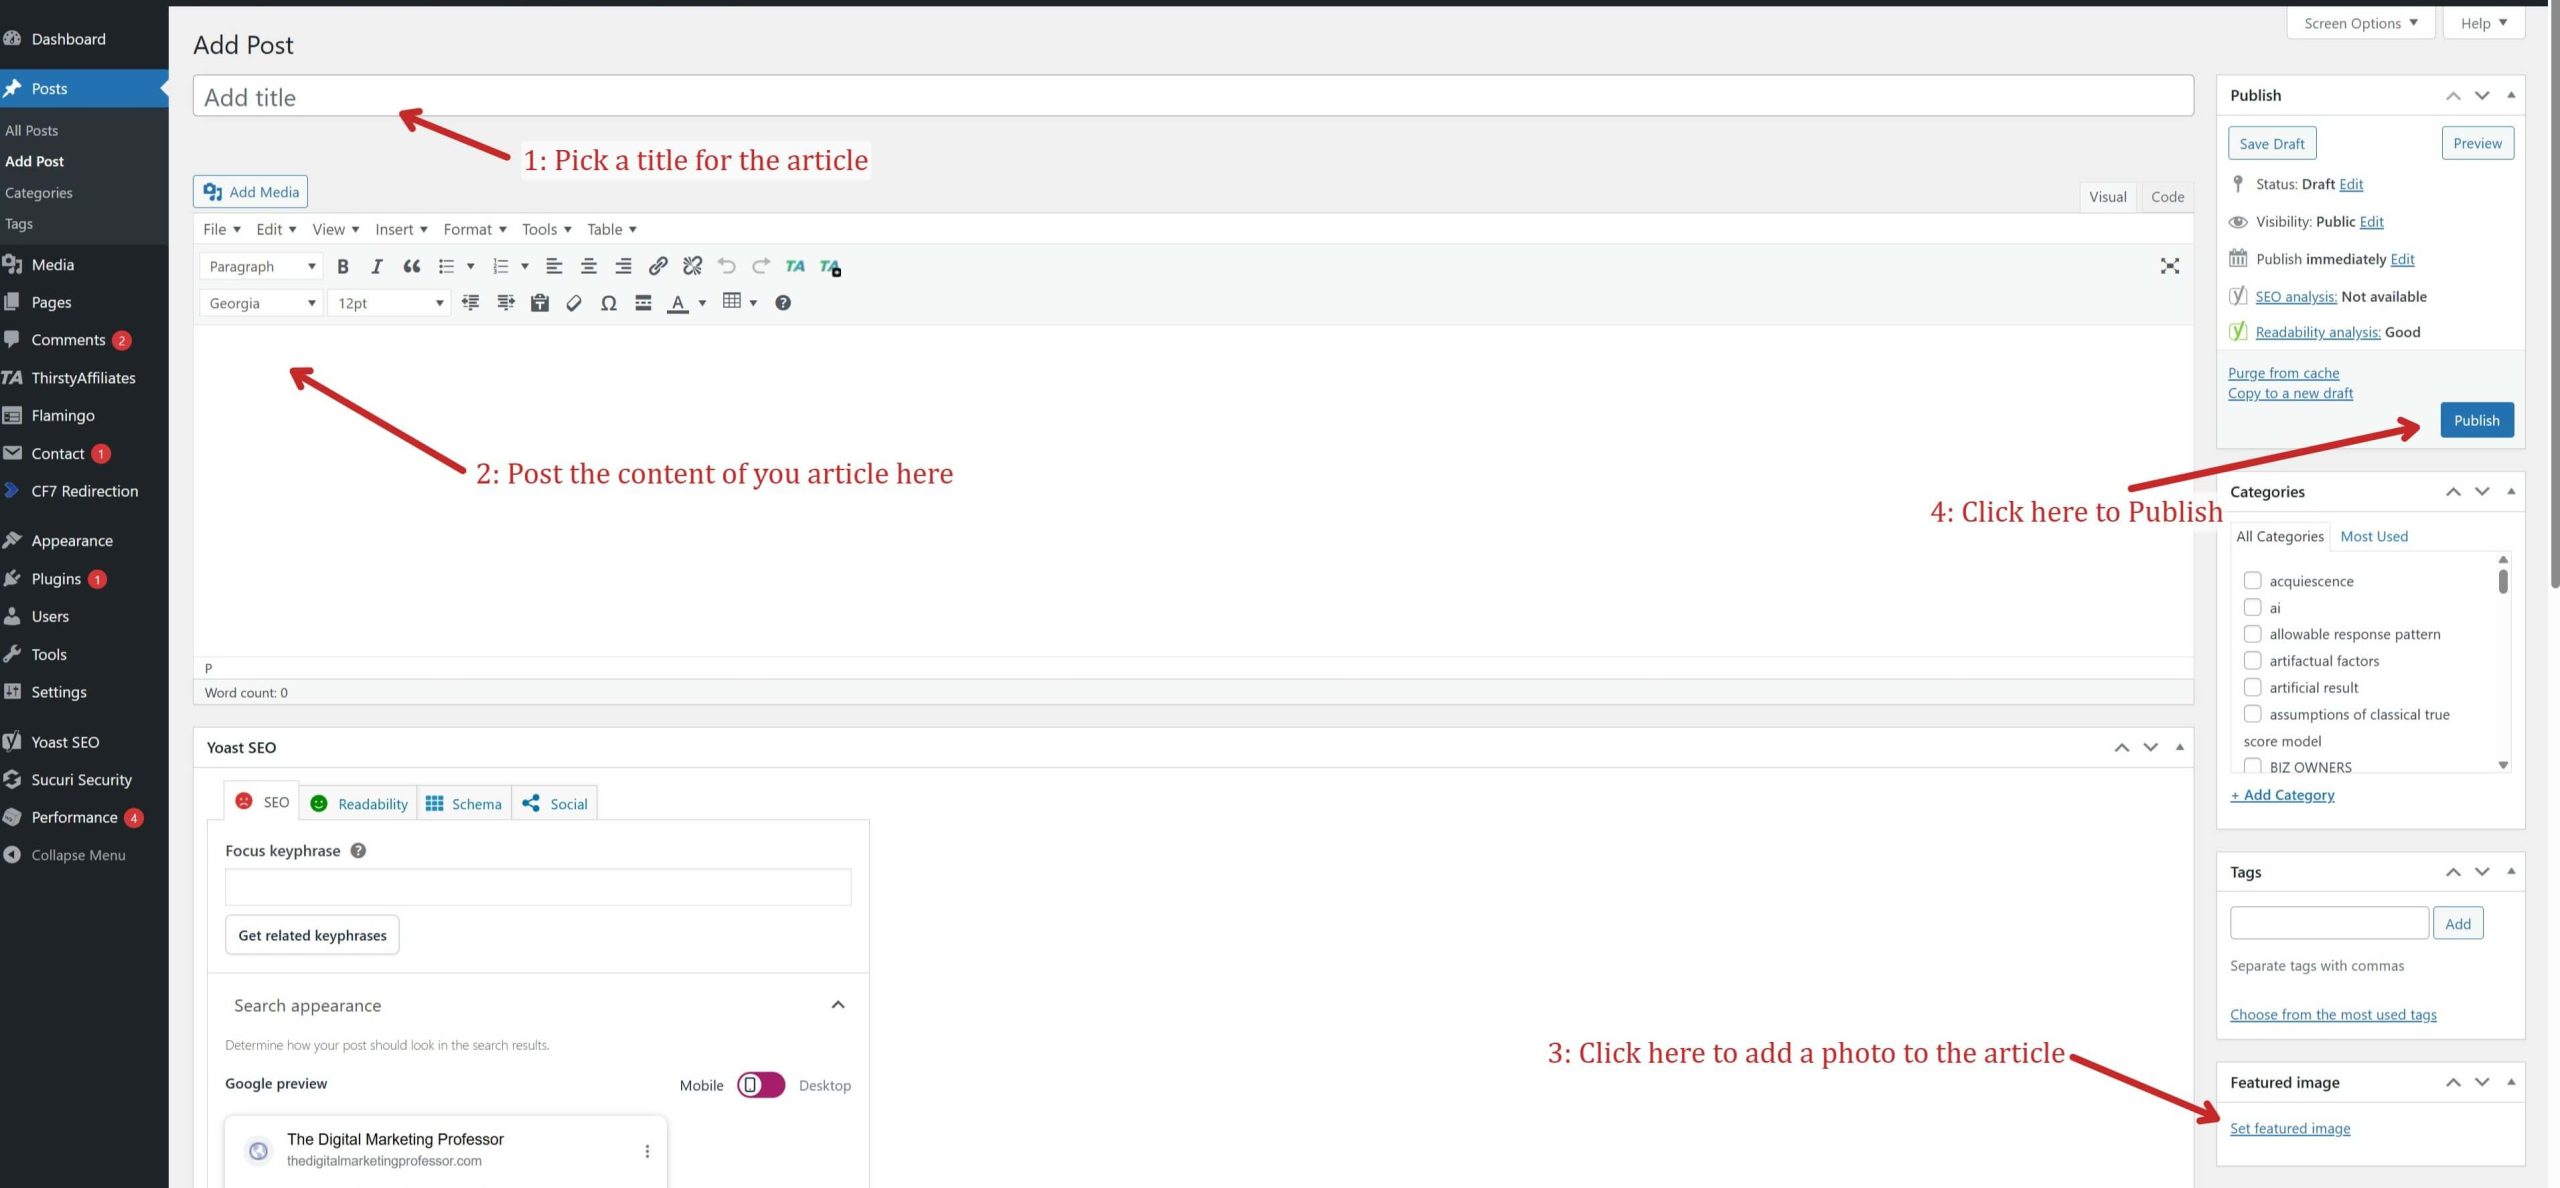
Now you are in the post editor. This is where you will build out your keyword-rich content for your specific ad group.
To get this page ready, you need to fill out four main areas:
-
Pick a title: Make sure it clearly relates to the ad group you are targeting.
-
Post your content: Write the body of your article here, ensuring your target keywords are naturally included.
-
Add a photo: Click the featured image section on the right to give the page a professional look.
-
Hit Publish: Click the blue button to make the page live on the backend.
Crucial Tip: Because this page is designed specifically to capture and convert ad traffic, you have to make sure you include a strong call-to-action (CTA). Place your signup forms or donation links both towards the top and towards the bottom of the content. If you don’t give the user a clear, immediate way to take action, building these pages is going to be pointless.
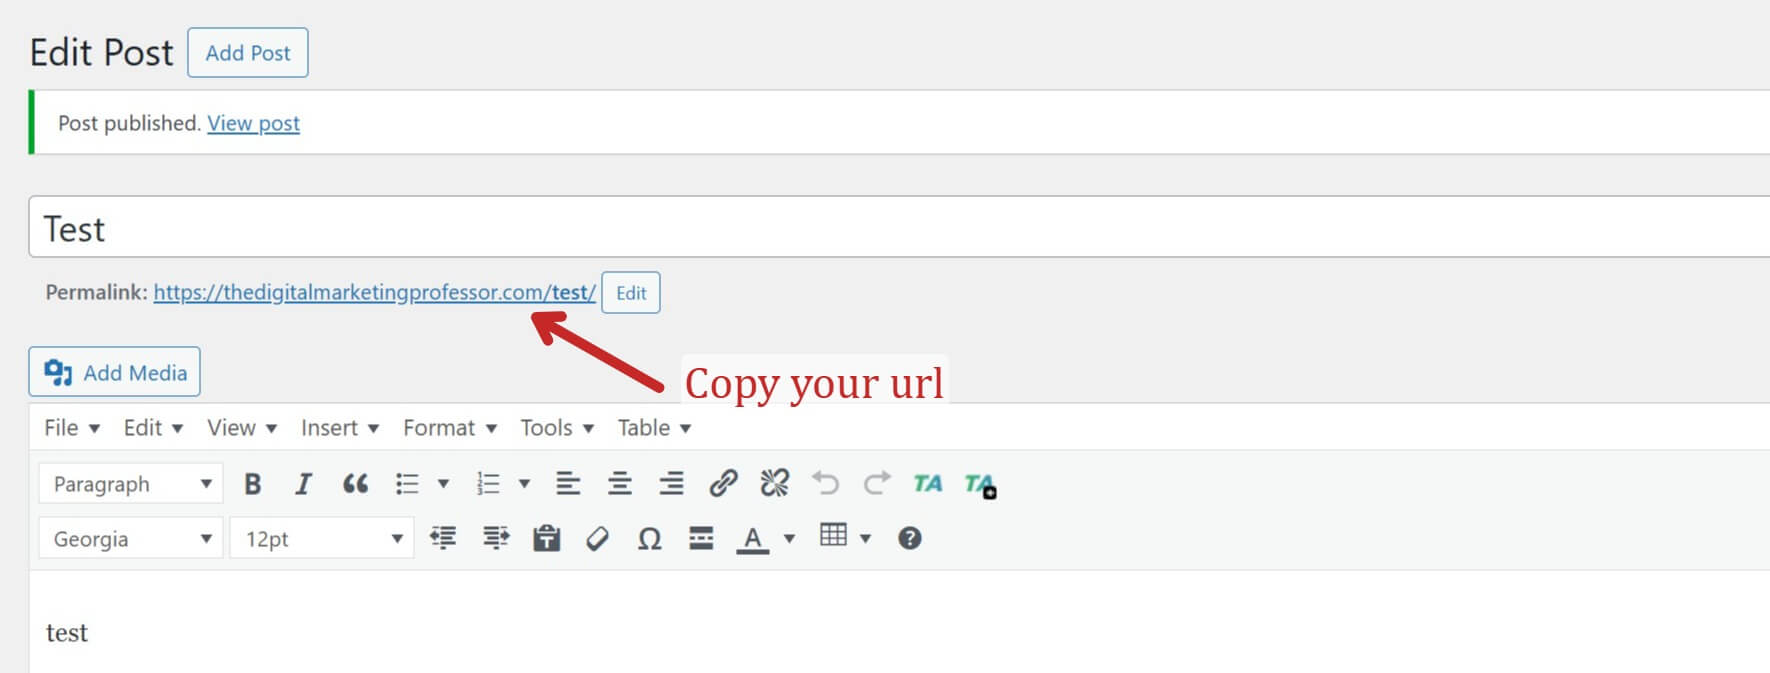
Securing Your Link: Copying the Post URL
Once you hit publish, WordPress will generate a live link for your new post.
Look right under the title of your post. You will see a “Permalink” with your new URL. Highlight that entire URL, right-click, and copy it to your clipboard.
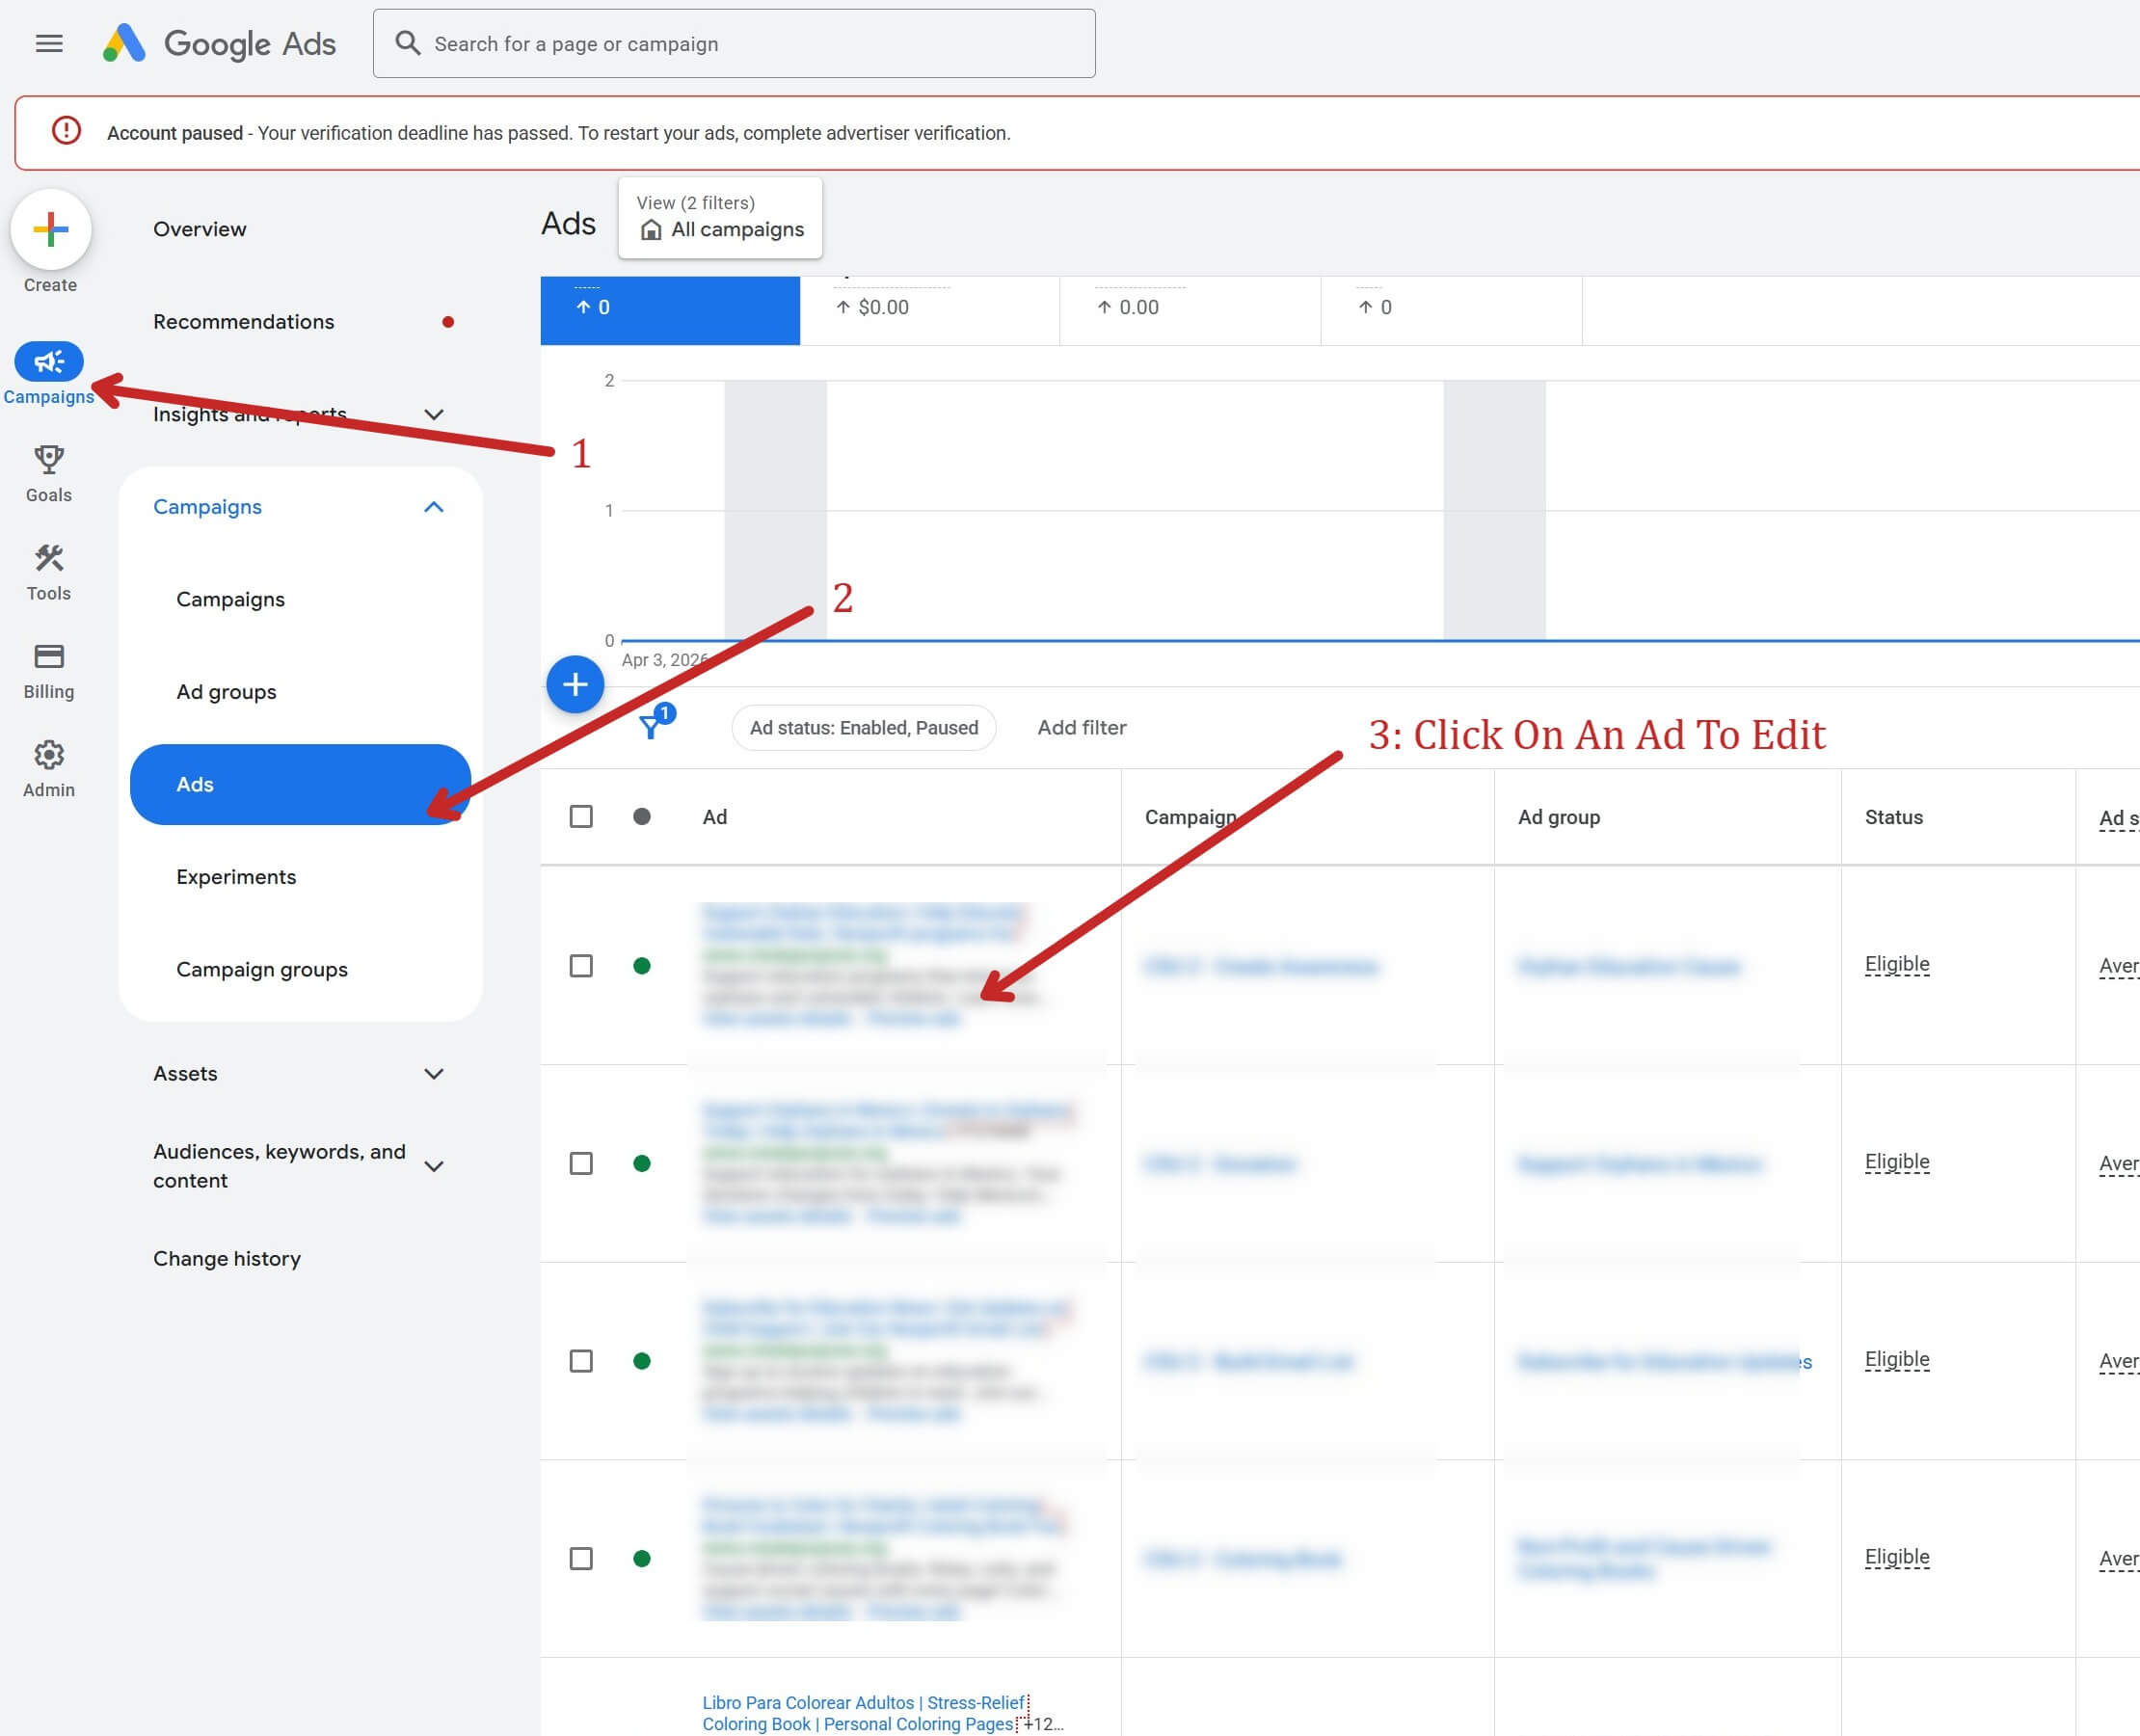
Feeding the Engine: Adding Your URL to Google Ads
Now that we have our perfectly optimized, hidden landing page, it is time to connect it to your ad campaign.
Open up your Google Ads account. On the left-hand sidebar menu, click on Campaigns, and then select Ads from the sub-menu.
Find the specific ad that matches the content you just wrote, and click on it to open the editor.
Scroll down in the ad editor until you see the Final URL box.
Simply paste the WordPress URL you just copied right into this field.
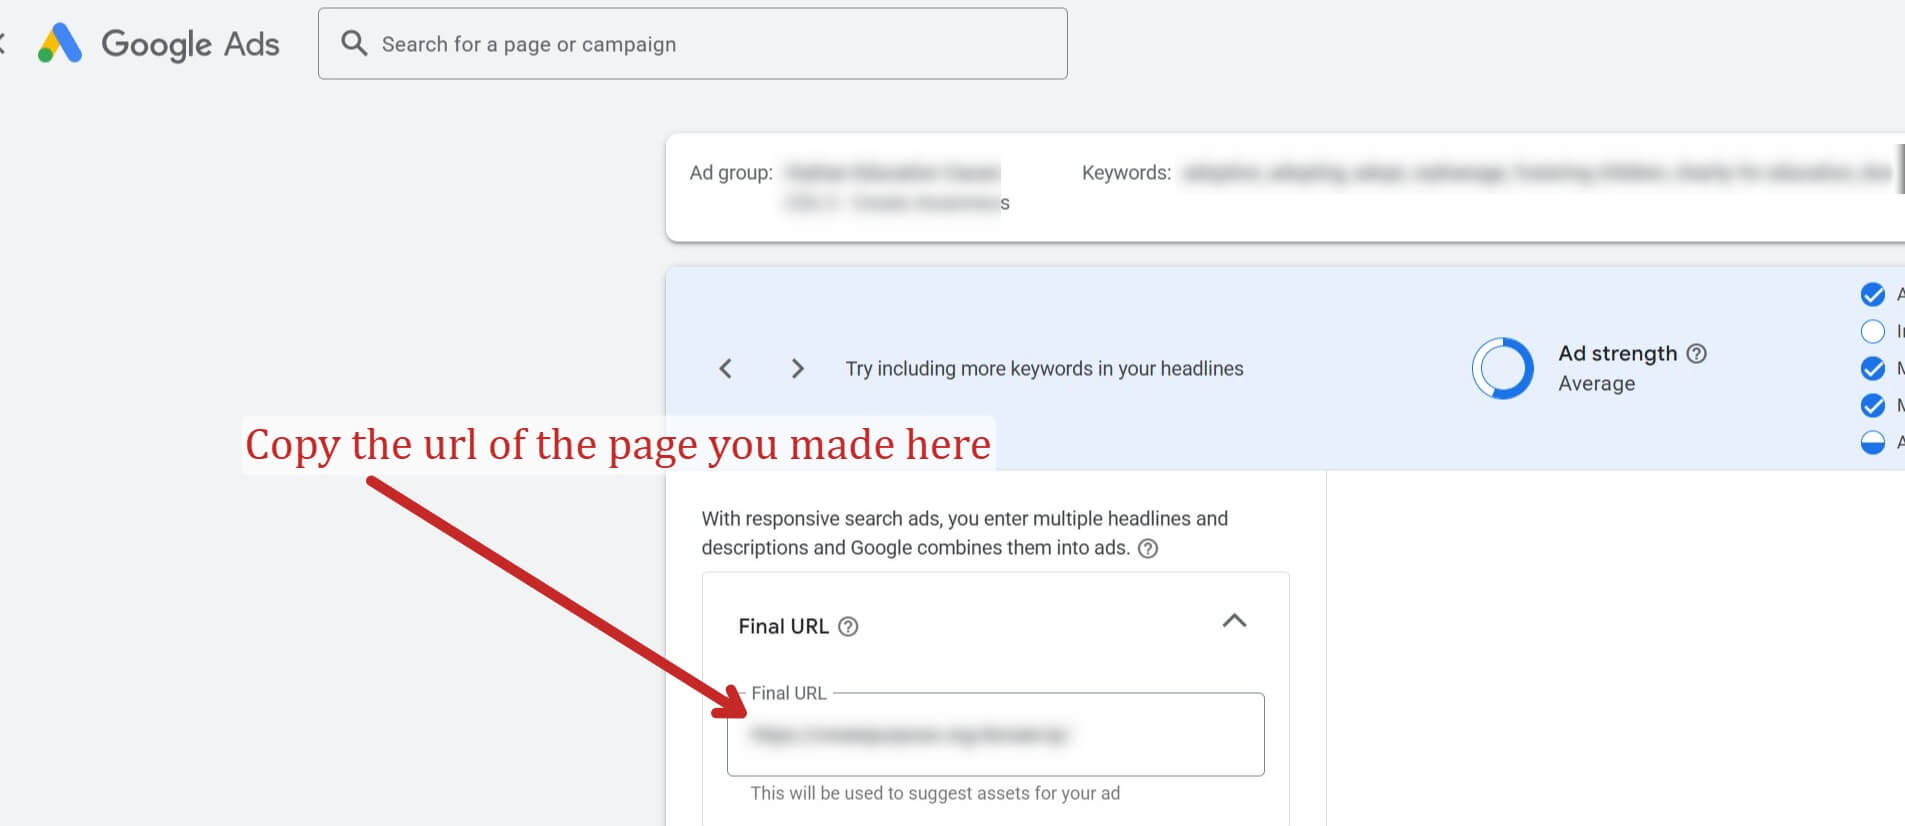
Save your ad, and you are done.
You now have a highly relevant, keyword-rich landing page working in the background to boost your ad performance. Repeat this process for your different ad groups, and you will give Google exactly what it needs to favor your bids.